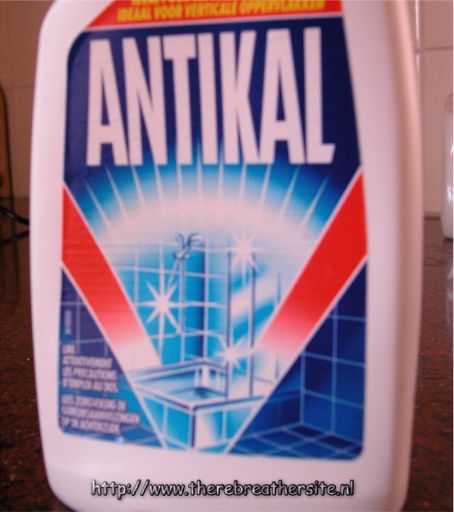
The Diluent button sometimes needs to be cleaned, or an O-ring replaced. Because the oxygen button comes into contact with pure oxygen, oxygen service conditions must be taken into account when overhauling it. That means cleaning with oxygen compatible cleaning agents such as Simpel Green or Biox. For the Diluent button, this is less critical but better to always work with a compatible cleaning agent. In this explanation, cleaning is done with antikal, and agent to dissolve limescale.
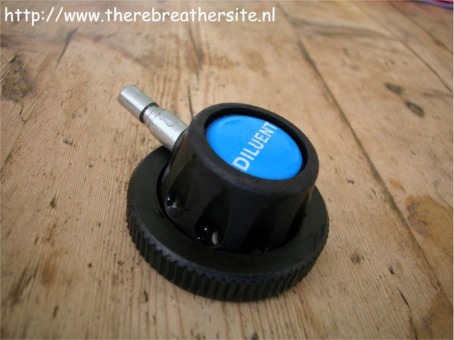
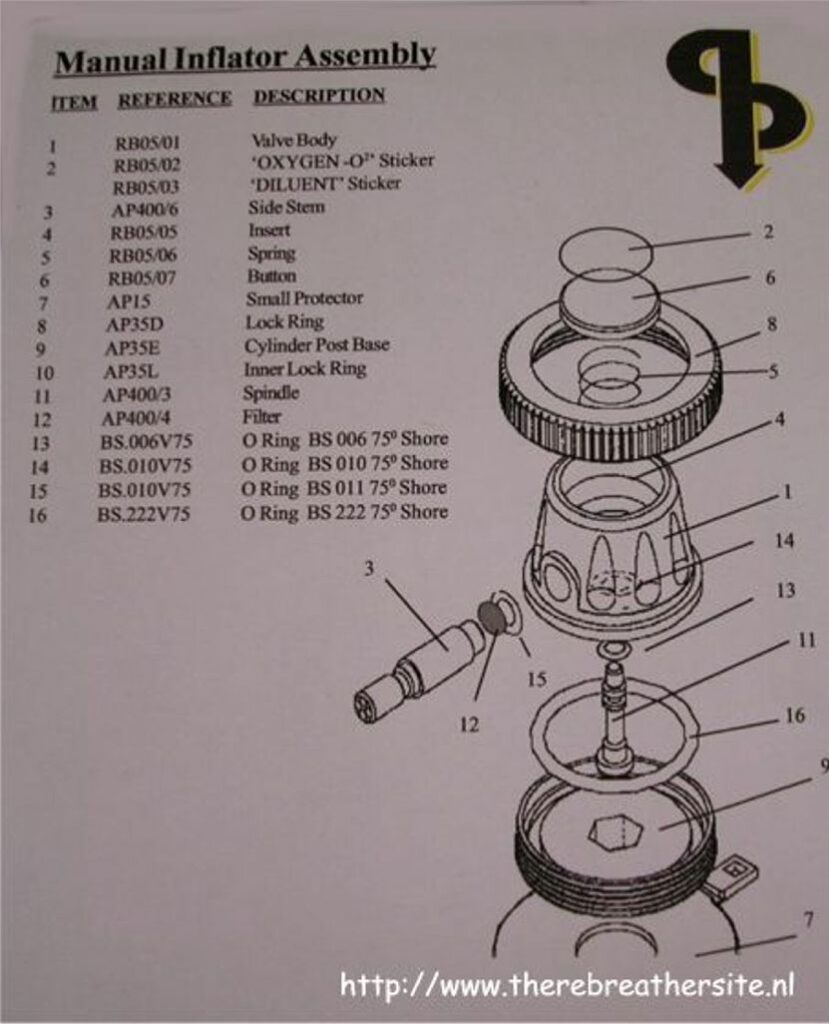
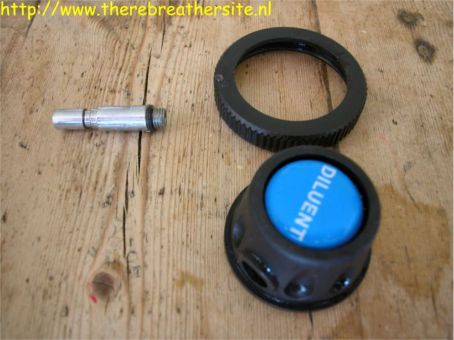
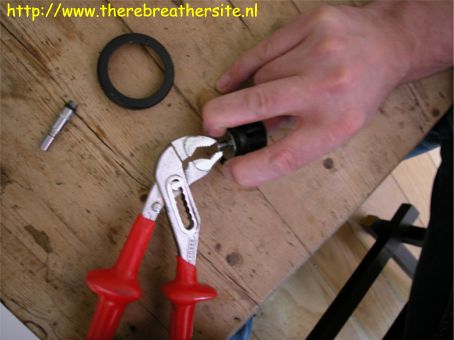
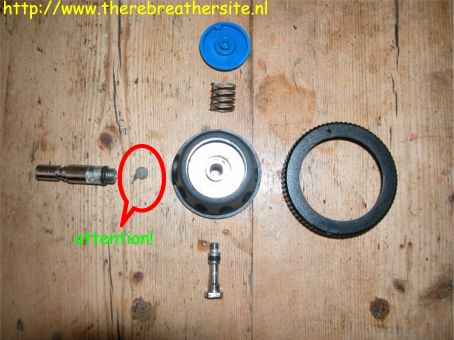
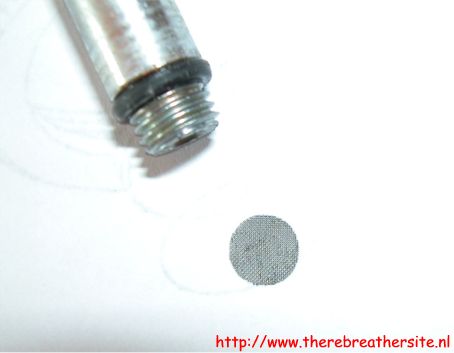
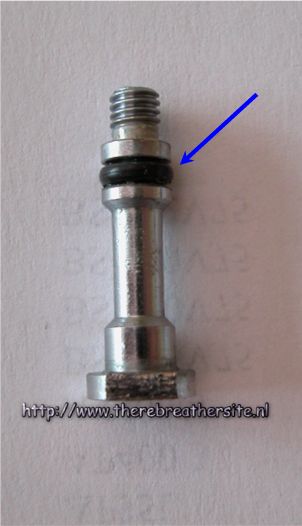
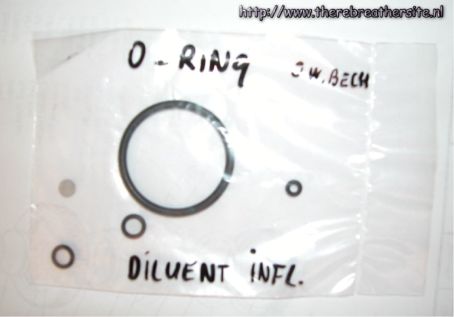
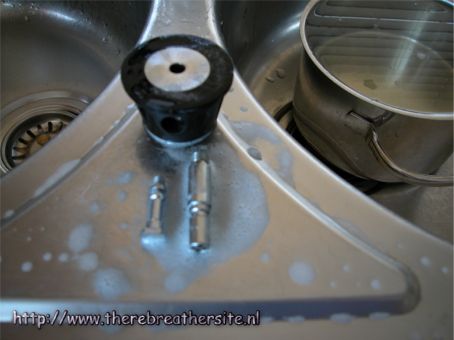
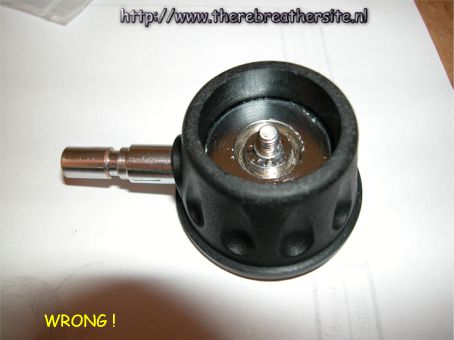
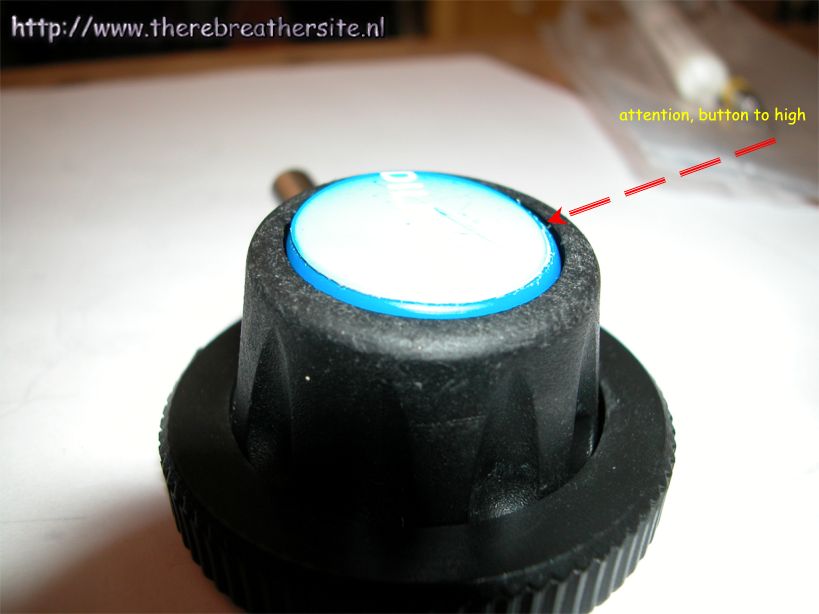
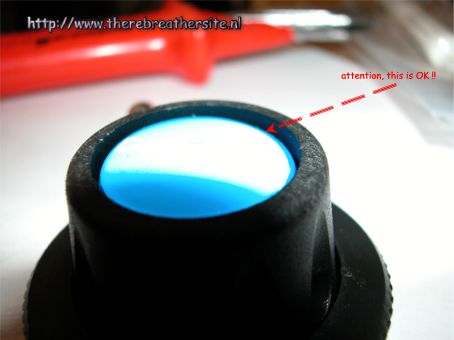
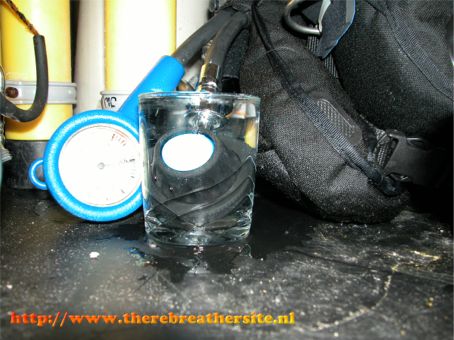
Leaking occurs almost always around the button. It is caused by the central O-ring which is most times damaged due to intensive usage.For a starter print this drawing and study the assembly orderFirst, take out the quick connector piston, now the plastic ring is free.To disassembly you need to unscrew the central bolt. To achieve this press the button very tight and slowly turn the bolt to the left. You need to push so hard that the force of friction is bigger than the force of rotation 😉In the central body of the inflator valve there is a very small filter. Take care you don’t lose this filter.Here you see the filter in detail. Also the chalk is visable. Replace the filter, or clean it.This O-ring causes the trouble. If this O-ring is damaged it is the source of the leak. When you take the O-ring from the shaft you don’t need to be careful. But with the assemblage take great care because small diameter O-rings easily break!This is the standard set APD provides. These are all standard 75 shore O-rings.To clean the parts intens, I use ANTIKAL. I kind of chalk remover for your sink. Works perfectly. Don’t forget to rinse the parts with clean water! You won’t like the taste of this stuff!Here are the cleaned parts. I always do this on the sink, it spares several hours of cleaning per day in my kitchen! After solving the limescale, rinse carefully with simplegreen or steamNow you can assemble the quick connector shaft….. or..If think you better first put the ring around the housing .. 😉Put the central shaft in its place and turn the button tight. If the button is above the housing it is not tight enough! Take great care this is an very important issue.Here you see the way it should be. The button and shaft tight.You could do a simple test to check leaking. Just put it on the inflator hose and hang it in a glass of water. There is 10 bar pressure on the hose. If it is tight, you can presume it is tight at 50 meters.
Therebreathersite was founded by Jan Willem Bech in 1999. After a diving career of many years, he decided to start technical diving in 1999. He immediately noticed that at that time there was almost no website that contained the history of closed breathing systems. The start for the website led to a huge collection that offered about 1,300 pages of information until 2019. In 2019, a fresh start was made with the website now freely available online for everyone. Therebreathersite is a source of information for divers, researchers, technicians and students. I hope you enjoy browsing the content!