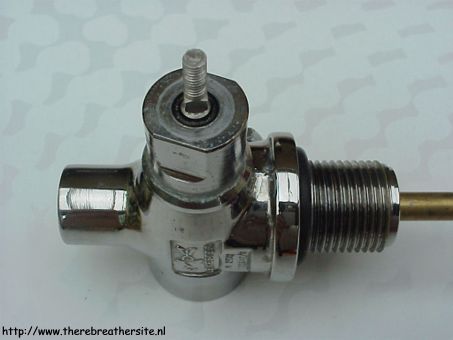
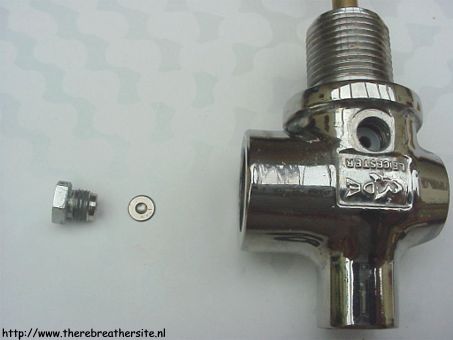
Warning: Maintenance to cylinder valves is a specialist job. You must know the basics of oxygen service. Also be sure before starting the job to completely empty the oxygen bottle. Empty it only in open air! Always leave the valve in the open position! Only use oxygen compatible greases. Clean all parts according oxygen service. The layout shown here refers only to my personal rebreather, and should not be used for other models, unless checked! The valve here serviced is a MDE Valveprovided by Ambient Pressure Diving Ltd to fit a 3 ltr. oxygen bottle. Oxygen under high pressure is a serious hazard, and should not be underestimated! OEM Spare parts are available at APD.
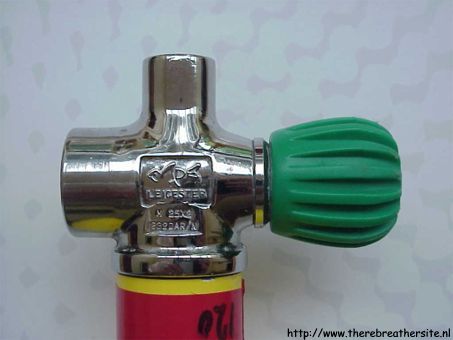
Ok, lets start. My problem was a leaking oxygen valve. For a start I bought spare-parts from APD. The leak was visible by the leaking oxygen along the stem. My inspiration is build in 1997 and has MDE valves. Check the marking. These valves are currently no longer in use on the newer generation Inspiration and Vision rebreathers. However, the operating principle has not changed, or has changed very little. Note that not all taps are designed to be used with 100% oxygen.
When the MDE marking is on your valve spare-parts will be identically. There are some differences between the newer valves, or DOT market bottles for the USA market. The basics will be the same however.
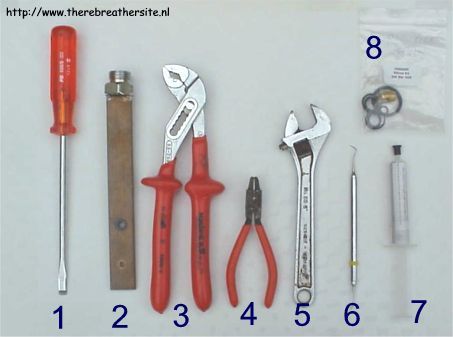
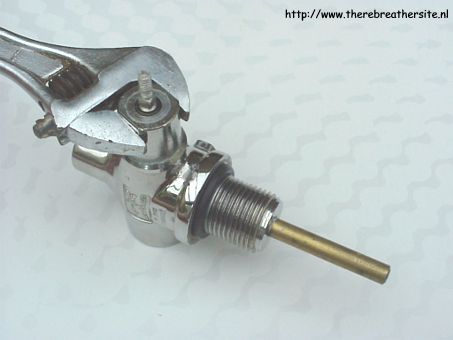
First of all we have to ensure all oxygen is released before unscrewing the valve. Leave the valve open during the job. Also take care to slowly release the oxygen so no ice will be formed on the opening! For our adventure we need a few tools to accomplish the job.
water pump pliers
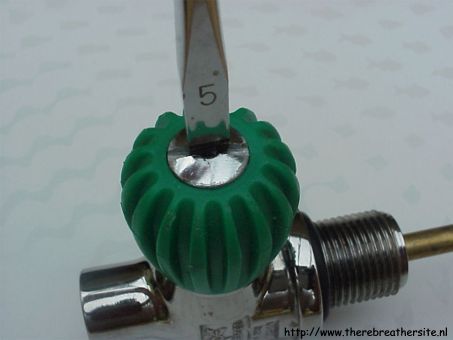
screwdriver no. 5
homemade tool to unscrew the valve
lock ring pliers
adjustable wrench
dental tool (things that make you say aaaaaaaaaaaahhh)
oxygen compatible grease
spare-part kit (contact Nicky Finn at APD)
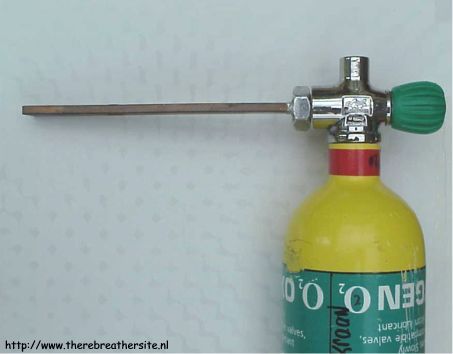
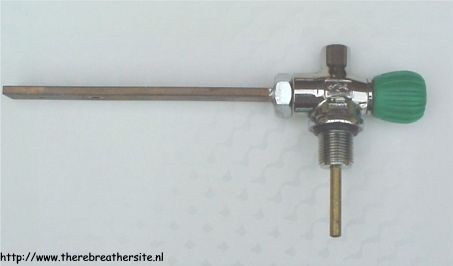
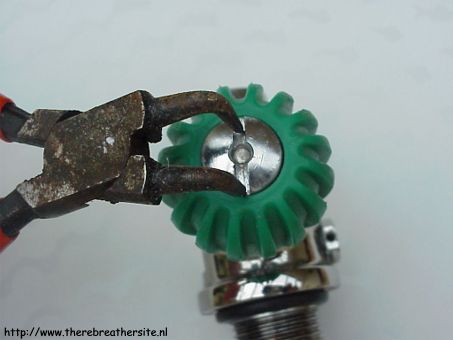
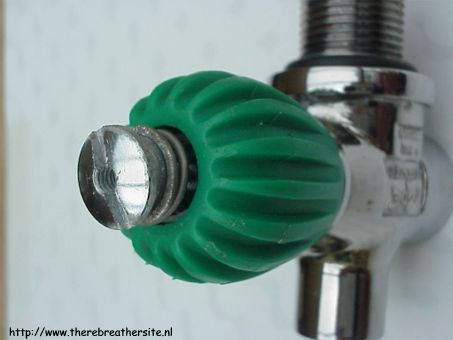
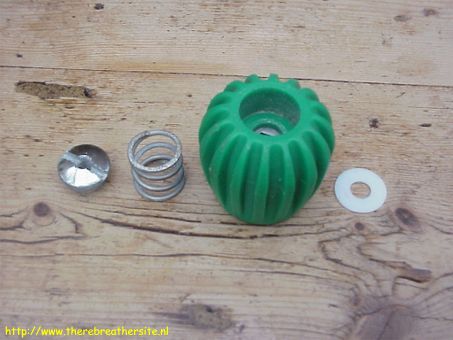
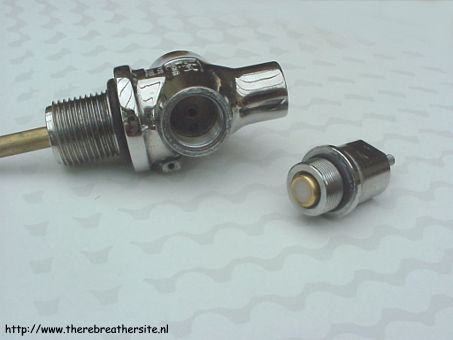
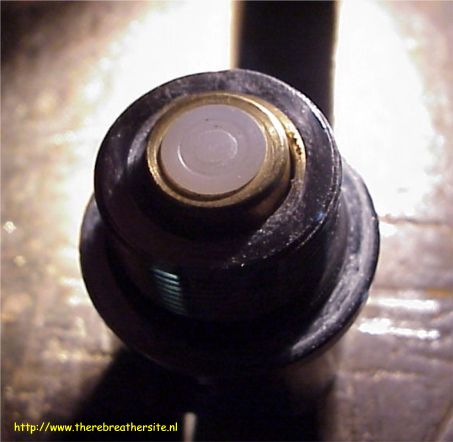
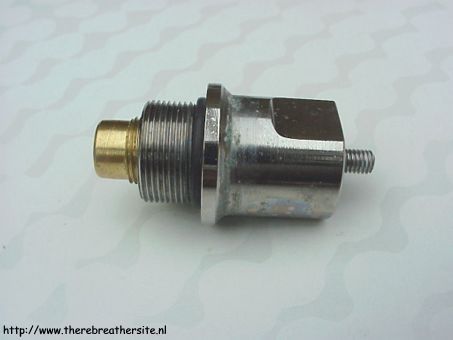
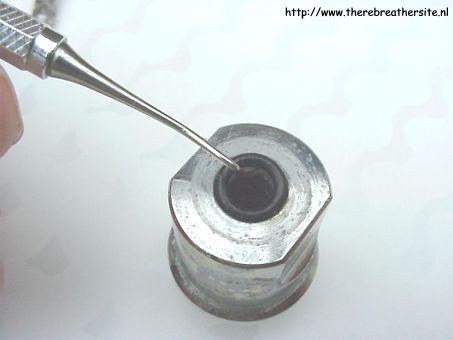
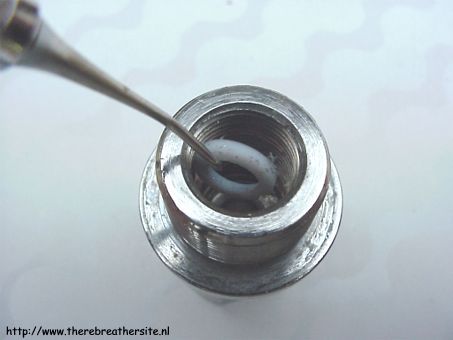
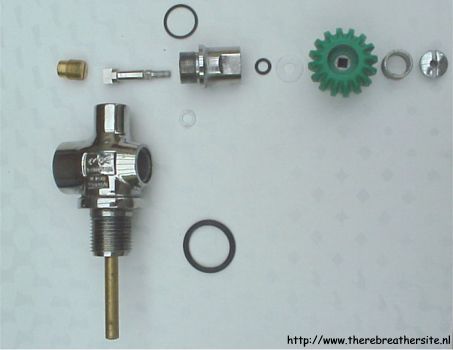
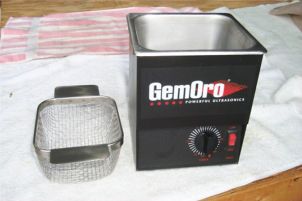
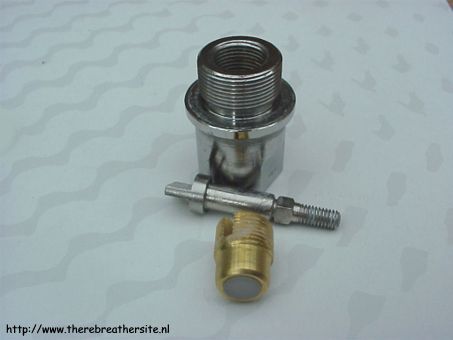
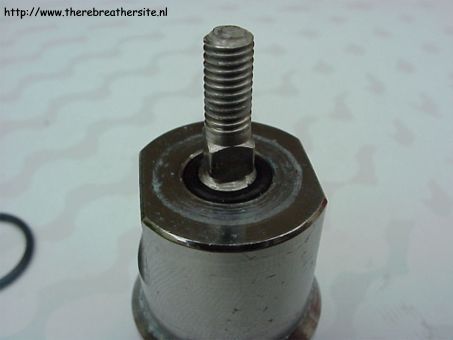
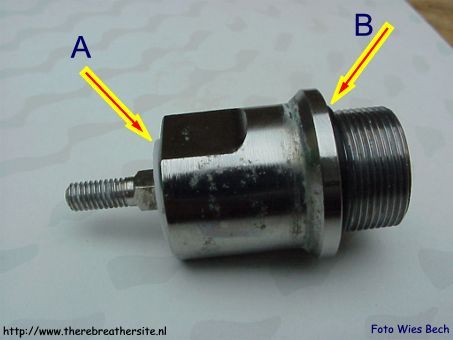
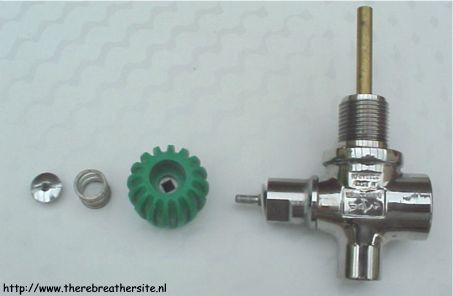
To unscrew the valve we check the tool for contaminations. No grease, oil or small particles should be on the thread.Now carefully put the tool in the valve. Use a proportional amount of force (;) to untie itHere it is. The thread should not be damaged, and clean.A good moment to inspect the inside of the bottle on corrosion….We need to unscrew the stem nut. The thread of the stem could be inside the groove. In that case a lock ring pliers solves this problem. Untie the nut by holding the hand wheel.The remaining thread is unscrewed by a number 5 or 6 screwdriver. Under the stem nut there is a spring. Take care not to loose it.Here the stem nut and spring are visible.Take the stem nut, spring, green knob and Teflon washer from the stem, and put them in order like you disassembled them.Here you see the valve body. The stem is enclosed by a O-ring visible here.Use the adjustable wrench to careful unscrew the bonnet nut. In case the nut is very tight you could use a bench-vice a two pieces of wood to hold the valve body.Here the bonnet nut is unscrewed and the high pressure seat becomes visible.This close-up clearly shows the problem. The seat is deformed by long term use and has to be replaced.Carefully turn the stem inwards resulting in the high pressure seat and plug turn out. Turn clock wise and the plug will move to the left on this picture.Here you see the bonnet nut, stem and seat plug and how it functions.Remove the O-ring on top of the bonnet nut.Also remove the packing washer. It becomes obvious that these parts need cleaning. Small particles of the washer and seat are polluting the valve.Here you see the complete dismantled valve.This is the safety device. The safety plug and safety disk. Attention: The spherical side points towards the plug!Clear all parts in a suitable solution. For example Simple Green. Use ultrasonic cleaning methods. Rinsing is with Simple Green will work fine as well but better results are obtained with ultrasonic devices.Here the assembling starts. First grease the moving parts light with an oxygen compatible grease.
WARNING: only use oxygen compatible grease since these parts are in direct contact with high pressure oxygen!!
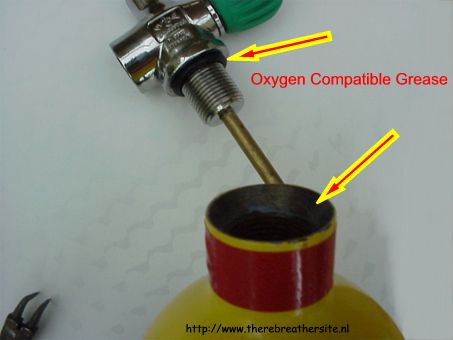
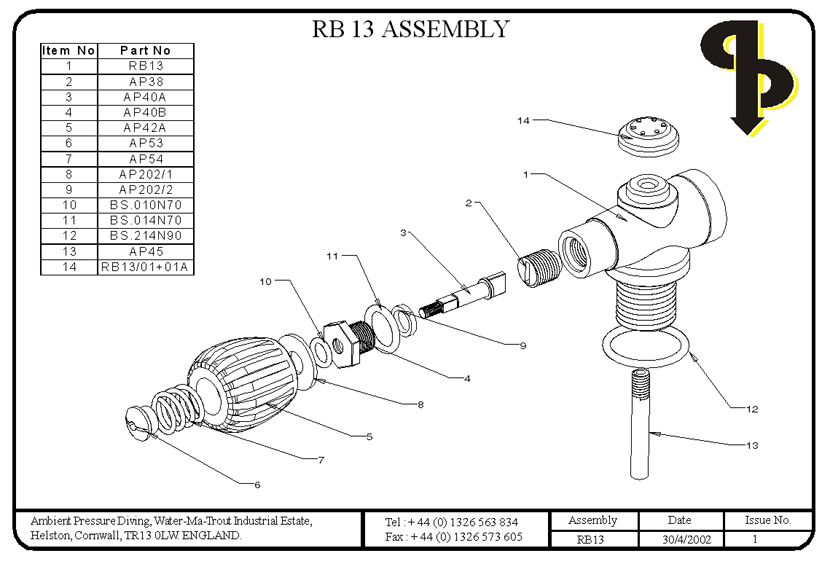
First put a new packing washer in the bonnet nut. Then replace the stem. Pull the stem maximal out and carefully turn the HP pressure seat plug in. Now push the stem back so it will make contact with the plug. Turn the stem counter clockwise until the seat is almost completely in the bonnet nut. It should not be possible to turn the stem even further. Now the valve should be positioned like thisOn the other site of the bonnet nut, a new greased O-ring is replaced. Replace the gasket under the safety disk (if you removed it) and put the safety disk back in place. Again, pay attention that the spherical side points towards the plug.Replace the hand wheel washer A and a new greased O-ring B.Screw the bonnet nut into the valve body. Take care not to touch any parts who are oxygen clean now.Last but not least, clean the taper end of the cylinder and add grease on the O-ring. Screw the valve in the bottle and tighten it. Now add some OCA (oxygen compatible air) until a pressure of approx 20 bar is reached. Test the valve on its functionality. If the valve is OK then you can put 200 bar of OCA to test the valve under normal conditions. If all works fine you can empty the bottle and fill with 100% oxygen.This is the newer RB 13 Assembly fitted on the latest rebreathers. Drawing thanks to Ambient Pressure Diving.
Therebreathersite was founded by Jan Willem Bech in 1999. After a diving career of many years, he decided to start technical diving in 1999. He immediately noticed that at that time there was almost no website that contained the history of closed breathing systems. The start for the website led to a huge collection that offered about 1,300 pages of information until 2019. In 2019, a fresh start was made with the website now freely available online for everyone. Therebreathersite is a source of information for divers, researchers, technicians and students. I hope you enjoy browsing the content!